How to Wire Light Switches – Residential
Wiring light switches can be an empowering DIY project for homeowners in Horry County looking to enhance their electrical skills. Whether you’re replacing an old switch or installing a new one, understanding how to wire 2-way, 3-way, and 4-way switches can save you time and money. In this guide, we’ll walk you through the process step-by-step, ensuring that you can complete the task safely and efficiently.
What You Need
Before you begin, gather the following tools and materials:
- Wire strippers
- Screwdriver
- Electrical tape
- Voltage tester
- Electrical wire (12/14 gauge)
- Light switches (2-way, 3-way, 4-way)
Types of Light Switches
- 2-Way Switch: This is the most common switch type, allowing you to control a single light fixture from one location.
- 3-Way Switch: Used when you want to control a light fixture from two different locations, such as at the top and bottom of a staircase.
- 4-Way Switch: This switch is used in conjunction with two 3-way switches to control a light fixture from three or more locations.
Wiring Light Switches
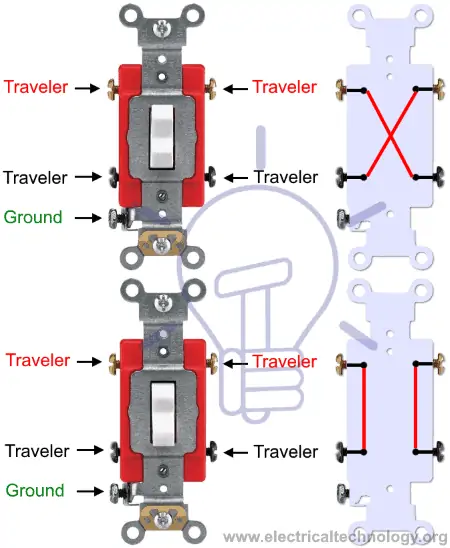
1. Wiring a 2-Way Switch
Diagram:
Steps:
- Turn off the power to the circuit at the breaker panel.
- Remove the cover plate and unscrew the switch.
- Connect the black (hot) wire to one of the switch terminals.
- Connect the other black wire (to the light fixture) to the other terminal.
- Secure the ground wire to the green screw.
- Reattach the cover plate and turn the power back on.
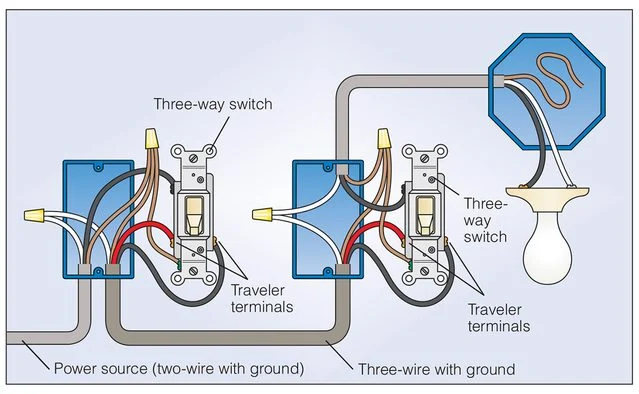
2. Wiring a 3-Way Switch
Diagram:
Steps:
- Turn off the power at the circuit breaker.
- Install two 3-way switches at the desired locations.
- Connect the common terminal of the first switch to the power source.
- Connect the traveler wires (usually red and black) to the two traveler terminals on both switches.
- Connect the common terminal of the second switch to the light fixture.
- Ground each switch appropriately.
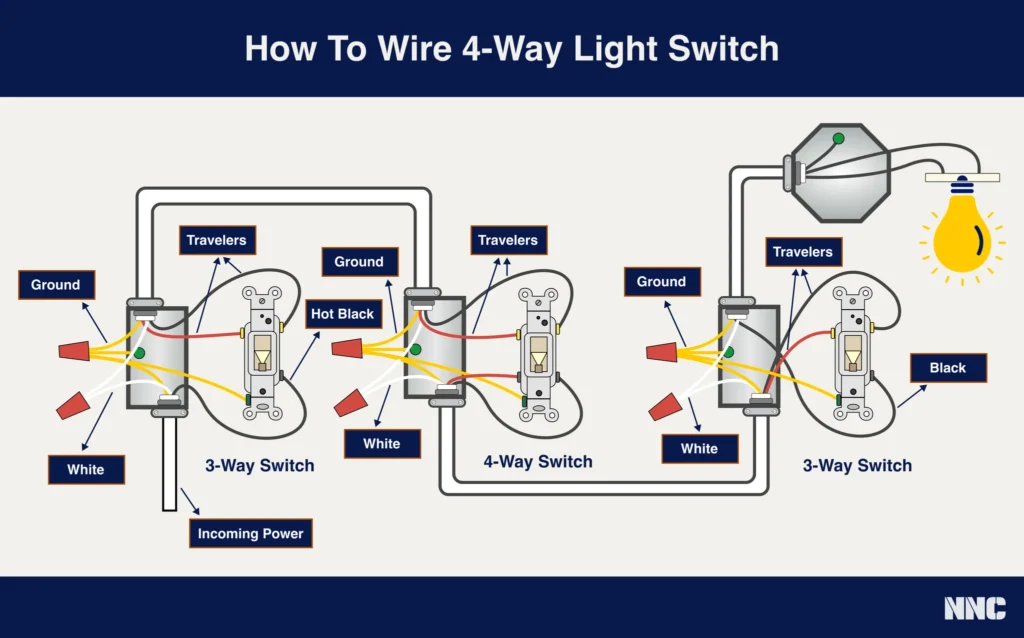
3. Wiring a 4-Way Switch
Diagram:
Steps:
- Install the 4-way switch between two 3-way switches.
- Connect the two traveler wires from the first 3-way switch to the 4-way switch’s input terminals.
- Connect the output terminals of the 4-way switch to the traveler wires leading to the second 3-way switch.
- Connect the common terminal of the last 3-way switch to the light fixture.
Wiring Table
| Switch Type | Function | Wiring Complexity |
|---|---|---|
| 2-Way | Control light from one point | Easy |
| 3-Way | Control light from two points | Moderate |
| 4-Way | Control light from three or more points | Advanced |
Safety Precautions
- Always turn off the power before working on electrical systems.
- Use a voltage tester to ensure that wires are not live.
- If unsure, consult with a licensed electrician.
Conclusion
Wiring light switches can be a straightforward DIY project if approached with care. By understanding the differences between 2-way, 3-way, and 4-way switches, you can confidently enhance your home’s lighting system in Horry County, SC.
For any electrical projects that may seem daunting, or if you prefer a professional touch, consider reaching out to Stroudswood Construction. As a licensed SC home builder, we offer quality residential construction services in Horry County, ensuring that all electrical work meets safety standards and is completed to your satisfaction.

Comments are closed